Page 56 - Microsoft Word - 4236
P. 56
Table 4.8
Nominal thread d 1 d 2 S
diameter type
d n 1 2
16 17.5 17 30 3.0
18 20 19 34 3.0
20 22 21 37 3.0
22 24 23 39 3.0
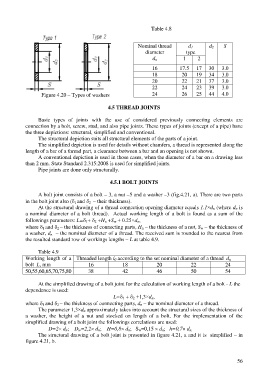
Figure 4.20 – Types of washers 24 26 25 44 4.0
4.5 THREAD JOINTS
Basic types of joints with the use of considered previously connecting elements are
connection by a bolt, screw, stud, and also pipe joints. These types of joints (except of a pipe) have
the three depictions: structural, simplified and conventional.
The structural depiction suits all structural elements of the parts of a joint.
The simplified depiction is used for details without chamfers, a thread is represented along the
length of a bar of a thread part, a clearance between a bar and an opening is not shown.
A conventional depiction is used in those cases, when the diameter of a bar on a drawing less
than 2 mm. State Standard 2.315:2008 is used for simplified joints.
Pipe joints are done only structurally.
4.5.1 BOLT JOINTS
A bolt joint consists of a bolt – 3, a nut –5 and a washer –3 (fig.4.21, а). There are two parts
in the bolt joint also ( 1 and 2 – their thickness).
At the structural drawing of a thread connection opening diameter equals 1.1×d n (where d n is
a nominal diameter of a bolt thread). Actual working length of a bolt is found as a sum of the
followings parameters: L= 1+ 2 +H n +S w + 0.25×d n,
where 1 and 2 – the thickness of connecting parts, H n – the thickness of a nut, S w – the thickness of
a washer, d n – the nominal diameter of a thread. The received sum is rounded to the nearest from
the resulted standard row of workings lengths – L at table 4.9.
Table 4.9
Working length of a Threaded length l 0 according to the set nominal diameter of a thread d n
bolt L, mm 16 18 20 22 24
50,55,60,65,70,75,80 38 42 46 50 54
At the simplified drawing of a bolt joint for the calculation of working length of a bolt - L the
dependence is used:
L= 1 + 2 +1,3×d n,
where 1 and 2 – the thickness of connecting parts, d n – the nominal diameter of a thread.
The parameter 1,3×d n approximately takes into account the structural sizes of the thickness of
a washer, the height of a nut and stocked on length of a bolt. For the implementation of the
simplified drawing of a bolt joint the followings correlations are used:
D=2 d n; D w=2,2 d n; H=0,8 d n; S w=0,15 d n; h=0,7 d n.
The structural drawing of a bolt joint is presented in figure 4.21, a and it is simplified – in
figure 4.21, b.
56

