Page 73 - 4234
P. 73
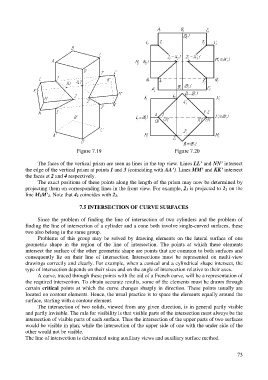
Figure 7.19                                 Figure 7.20

                  The faces of the vertical prism are seen as lines in the top view. Lines LL’ and NN’ intersect
            the edge of the vertical prism at points 1 and 3 (coinciding with AA’). Lines MM’ and KK’ intersect
            the faces at 2 and 4 respectively.
                  The exact positions of these points along the length of the prism may now be determined by
            projecting them on corresponding lines in the front view. For example, 2 1 is projected to 2 2 on the
            line M 2M’ 2. Note that 4 2 coincides with 2 2.

                                    7.5 INTERSECTION OF CURVE SURFACES


                  Since the problem of finding the line of intersection of two cylinders and the problem of
            finding the line of intersection of a cylinder and a cone both involve single-curved surfaces, these
            two also belong in the same group.
                  Problems of this group may be solved by drawing elements on the lateral surface of one
            geometric shape in the region of the line of intersection. The points at which these elements
            intersect the surface of the other geometric shape are points that are common to both surfaces and
            consequently lie on their line of intersection. Intersections must be represented on multi-view
            drawings correctly and clearly. For example, when a conical and a cylindrical shape intersect, the
            type of intersection depends on their sizes and on the angle of intersection relative to their axes.
                  A curve, traced through these points with the aid of a French curve, will be a representation of
            the required intersection. To obtain accurate results, some of the elements must be drawn through
            certain critical points at which the curve changes sharply in direction. These points usually are
            located on contour elements. Hence, the usual practice is to space the elements equally around the
            surface, starting with a contour element.
                  The intersection of two solids, viewed from any given direction, is in general partly visible
            and partly invisible. The rule for visibility is that visible parts of the intersection must always be the
            intersection of visible parts of each surface. Thus the intersection of the upper parts of two surfaces
            would be visible in plan; while the intersection of the upper side of one with the under side of the
            other would not be visible.
            The line of intersection is determined using auxiliary views and auxiliary surface method.


                                                                                                          73

