Page 6 - 6413
P. 6
DEFLECTING DEVICES.
As you know, each measurement of physical size gives a certain
error. For a real value of the measured electric value, take a value that
is measured by the instrument, which is also not absolutely accurate.
The measuring devices are in the metrological laboratories and all the
devices used for scientific research and production should be
periodically verified with the instrumentation.
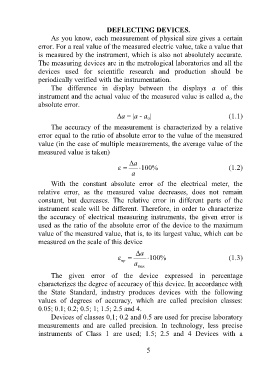
The difference in display between the displays а of this
instrument and the actual value of the measured value is called а the
о
absolute error.
а = |а - а | (1.1)
о
The accuracy of the measurement is characterized by a relative
error equal to the ratio of absolute error to the value of the measured
value (in the case of multiple measurements, the average value of the
measured value is taken)
a
100% (1.2)
a
With the constant absolute error of the electrical meter, the
relative error, as the measured value decreases, does not remain
constant, but decreases. The relative error in different parts of the
instrument scale will be different. Therefore, in order to characterize
the accuracy of electrical measuring instruments, the given error is
used as the ratio of the absolute error of the device to the maximum
value of the measured value, that is, to its largest value, which can be
measured on the scale of this device
a
100% (1.3)
пр
a
max
The given error of the device expressed in percentage
characterizes the degree of accuracy of this device. In accordance with
the State Standard, industry produces devices with the following
values of degrees of accuracy, which are called precision classes:
0.05; 0.1; 0.2; 0.5; 1; 1.5; 2.5 and 4.
Devices of classes 0,1; 0.2 and 0.5 are used for precise laboratory
measurements and are called precision. In technology, less precise
instruments of Class 1 are used; 1.5; 2.5 and 4 Devices with a
5

