Page 18 - Microsoft Word - 4236
P. 18
2 PROJECTION DRAWING


                  An important part of drawing work is the representation of the exact shaрe and size of a solid
            object. The solid which has length, breadth and thickness (three dimensional) is regarded as two
            dimensional on the surface of a drawing sheet.
                  State Standard 2.305-68 sets the rules of object depictions (wares, buildings and their
            component parts) on the drawings of all branches of industry.
                  The number of depictions of an object must be minimum but sufficient for determination of
            its form and forms all its elements.
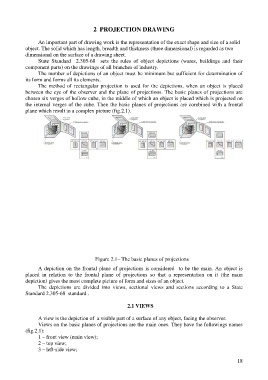
                  The method of rectangular projection is used for the depictions, when an object is placed
            between the eye of the observer and the plane of projections. The basic planes of projections are
            chosen six verges of hollow cube, in the middle of which an object is placed which is projected on
            the internal verges of the cube. Then the basic planes of projections are combined with a frontal
            plane which result in a complex picture (fig.2.1).


                                           Figure 2.1– The basic planes of projections

                  A depiction on the frontal plane of projections is considered to be the main. An object is
            placed in relation to the frontal plane of projections so that a representation on it (the main
            depiction) gives the most complete picture of form and sizes of an object.
                  The depictions are divided into views, sectional views and sections according to a State
            Standard 2.305-68 standard .


                                                          2.1 VIEWS

                  A view is the depiction of a visible part of a surface of any object, facing the observer.
                  Views on the basic planes of projections are the main ones. They have the followings names
            (fig.2.1):
                  1 – front view (main view);
                  2 – top view;
                  3 – left-side view;

                                                                                                          18

