Page 7 - 6686
P. 7
X - true value of measured quantity.
Absolute error can not be a measure of accuracy. For
example, Δ = 0,5 mm for x = 100 mm is quite small, but for x = 5
mm it is very big. That’s why there was introduced the concept of
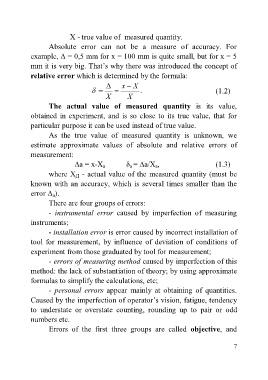
relative error which is determined by the formula:
x X
. (1.2)
X X
The actual value of measured quantity is its value,
obtained in experiment, and is so close to its true value, that for
particular purpose it can be used instead of true value.
As the true value of measured quantity is unknown, we
estimate approximate values of absolute and relative errors of
measurement:
∆a = х-Х a δ a = ∆a/Х a, (1.3)
where Х Д - actual value of the measured quantity (must be
known with an accuracy, which is several times smaller than the
error Δ a).
There are four groups of errors:
- іnstrumental error caused by imperfection of measuring
instruments;
- іnstallation error is error caused by incorrect installation of
tool for measurement, by influence of deviation of conditions of
experiment from those graduated by tool for measurement;
- errors of measuring method caused by imperfection of this
method: the lack of substantiation of theory; by using approximate
formulas to simplify the calculations, etc;
- personal errors appear mainly at obtaining of quantities.
Caused by the imperfection of operator’s vision, fatigue, tendency
to understate or overstate counting, rounding up to pair or odd
numbers etc.
Errors of the first three groups are called objective, and
7

