Page 33 - 4334
P. 33
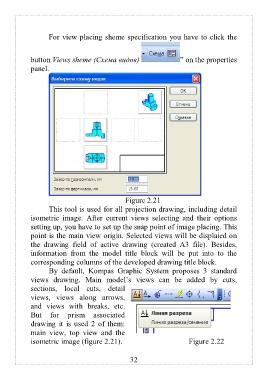
For view placing sheme specification you have to click the


           button Views sheme (Схема видов)              ” on the properties
           panel.


                                        Figure 2.21
                This tool is used for all projection drawing, including detail
           isometric  image.  After  current  views  selecting  and  their  options
           setting up, you have to set up the snap point of image placing. This
           point is the main view origin. Selected views will be displaied on
           the  drawing  field  of  active  drawing  (created  A3  file).  Besides,
           information  from  the  model  title  block  will  be  put  into  to  the
           corresponding columns of the developed drawing title block.
                By  default,  Kompas  Graphic  System  proposes  3  standard
           views  drawing.  Main  model’s  views  can  be  added  by  cuts,
           sections,  local  cuts,  detail
           views,  views  along  arrows,
           and  views  with  breaks,  etc.
           But  for  prism  associated
           drawing  it  is used 2 of them:
           main  view,  top  view  and  the
           isometric image (figure 2.21).                   Figure 2.22


                                          32

